Picture 29 Hull Details: While the track assemblies dried (Don’t rush them—when in doubt give it overnight to dry.) I was adding details to the hulls and turrets. Here plastic strips add detail to the glacis, rear deck and machinegun turrets. Some thin sheet forms the side and top crew compartment doors.
Picture 30 Hull and Tracks: Here a hull awaits
attachment of the suspension units.
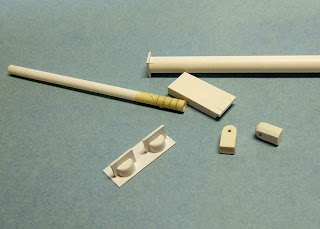
Picture 31 Tubes and Cylinders Two: But first some
more do-dads: the transmission covers and return wheel supports. Thicker plastic can be built up by laminating
thinner sheet. Thicker ends on tubes can
be sanded to create curve or domed tube-ends or caps.
Picture 32 Suspension Details: A closer look
at building complex looking parts out of basic shapes and layers.
Picture 33 Mounting the Tracks: The tracks are
then mounted with a transmission bit at the front and return wheel support at
the back.
Picture 34 Mantlet: A thick block of laminated plastic was
carved into the shape of the mantlet.
This was then pushed into a ball of green stuff. The original was pulled out before the green
stuff dried. Lower right is the plastic
original, and lower left the green stuff mould.
When cured, the interior of the green stuff mould was wetted down with
some water and ‘squashed onto a blob of fresh mixed green stuff. The two paint
jars each have a formed mantlet.
Originally a squash mould was planned for the bogies, but the technique
does not provide of a lot of detail. Latex
moulds are sufficient for the Alumilite.
RTV moulds would probably be a better quality option but are more
expensive.
Picture 35 On Tracks: The two tanks are shaping up nicely. The mantlets were trimmed, sanded and
installed. Some brass rod will be used
for the guns and machineguns.


No comments:
Post a Comment